After the short review of Radetzky's March, I played the main historical campaign.
It was really fun. The Piedmontese kept 4th Div (Ferdinando) east of the Ticino, threatening Abbiategrasso and Magenta, and this forced the Austrians to send the full I Corps (Wratislaw) north to face it. Appel's III Corps also went north, but then turned west and crossed the Ticino at the ford (then bridge, thanks to pontooners) near Bereguardo.
It was really fun. The Piedmontese kept 4th Div (Ferdinando) east of the Ticino, threatening Abbiategrasso and Magenta, and this forced the Austrians to send the full I Corps (Wratislaw) north to face it. Appel's III Corps also went north, but then turned west and crossed the Ticino at the ford (then bridge, thanks to pontooners) near Bereguardo.
The few units from Ramorino's 5th Div actually performed admirably, slowing the Austrian advance and allowing Piedmontese reinforcements to get to Mortara and Vigevano, with Bes' 2nd Div actually getting as south as S.Siro (roughly as historical). Perrone's 3rd Div followed Bes as support, while Solaroli's Independent Brigade reached Vigevano to both act as rearguard and protect the nearby Ticino crossing (to ward off any attack from Wratislaw who was fighting Ferdinando on the other side).
After finally eliminating the delaying units, the Austrian organized their advance west of the Ticino in this way: Appel's III Corps on the right aiming for S.Siro and then Vigevano. D'Aspre's II Corps in the centre aiming for the main road to Mortara, but helping Appel's Corps with some troops (this ended up slower than planned, with almost 1 division being held up by Piedmontese troops near S.Siro for almost one day), Thurn's IV Corps on the left, making a wide flanking march to reach Mortara from the south and, in the meantime, screen Ramorino's off-map Div. In the rear, Wocher's Reserve Corps moved late and slowly to support the attack. It then detached some troops to mask Ramorino (freeing IV Corps troops) while the Cavalry, Grenadiers and Artillery supported the main effort, especially towards Vigevano.
 |
| West of the Ticino |
 |
| East of the Ticino |
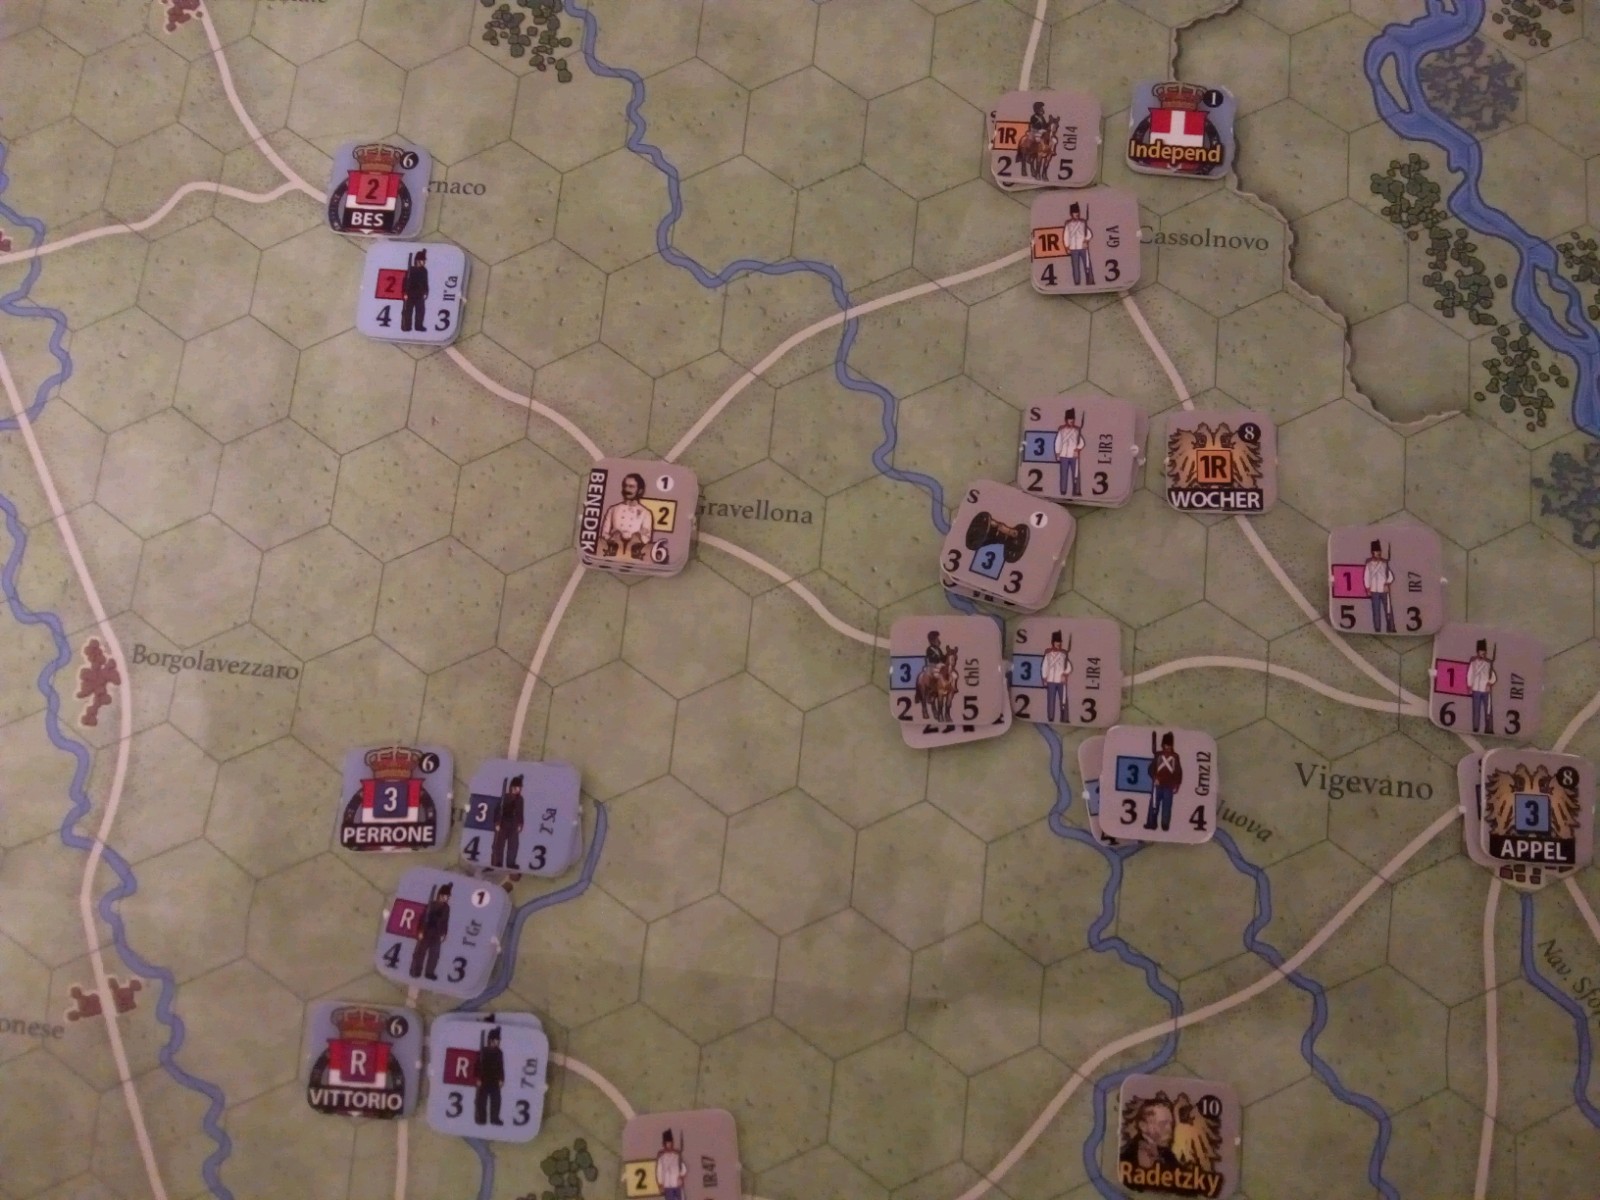
In general, the slow Austrian advance allowed the Piedmontese to concentrate, slowing the Austrian advance considerably more, but the Piedmontese, in turn, were forced to feed more and more troops, especially in front of Vigevano where the battle was fierce around Borgo S.Siro. Both Bes and Perrone had to be put in first line. Ultimately, the arrival of Wocher's Reserve Corps Grenadiers and more focused attacks by Appel's III Corps allowed the Austrians to break the enemy line and defending units became interspersed. Solaroli's brigade was moved south to check the enemy advance on Vigevano, while a Reserve Div brigade of cavalry held the town. Rest of the Reserve held the center in front of Mortara, blocking D'Aspre's II Corps, but ultimately Benedek broke through at the end of the 2nd day.
 |
| Austrian breakthrough |
At this point, third day, the battle became one of survival for the Piedmontese. 2nd and 3rd Div lost many troops and Solaroli's Brigade too. Austrian troops advanced towards Vigevano. It was a slow crawl, as defenders held on with all their valour, but ultimately couldn't stop the enemy, superior in number.
Finally, Appel's III Corps surrounded Vigevano and it fell. As the third day closed, the Austrians prepared to march towards Novara, sending some cavalry north to try to cut enemy supply lines (I probably did a gameplay error, not checking their supply status - you can't move a unit voluntarily out of supply). Both Bes and Perrone were able to rally one brigade each to re-establish a sort of line north of Mortara which still held, dspite Durando's 1st Div (reinforced by some units of Vittorio Emanuele's Reserve Div) being ultimately hard pressed by Thurn's IV Corps.
 |
| Austrian have almost surrounded Vigevano |
 |
| General situation at end of battle. Austrians took Vigevano, while Mortara still holds |
 |
| Detail of situation at Mortara, with Durando still holding on and remnants of Piedmontese units rebuilding line of defense just north of it |
 |
| Detail of situation near Vigevano. Austrian units swarm north, pursuing the remnants of Bes' 2nd Division |
East of the Ticino Ferdinando, good like his real counterpart, fought a brilliant action against Wratislaw's I Corps. 4th Div repulsed the enemy advance, took Abbiategrasso and sent one brigade (two full-strength units) east towards Milan. Even without these troops, Ferdinando was able to keep Abbiategrasso until the end, even if after the fall of Vigevano probably he would have had to return to the west bank of Ticino to protect his lines of communications. Wratislaw however was still able to send one brigade towards Vigevano across the Ticino.
 |
| Across the Ticino: Ferdinando vs Wratislaw |
 |
| End of battle across the Ticino: Ferdinando still controls Abbiategrasso, even without two units that had marched towards Milan |
It was the end of the 22nd, and I chose to end the battle. Actually, counting losses I think the Austrians had won earlier than this, due to difference in casualty levels. But it was fun to go on until darkness. The Piedmontese army was defeated, with 2 divisions shattered and one independent brigade destroyed, and losses to several other units. General tactical situation was compromised too, with Ferdinando's successes the only bright spot, and not enough to change the main battle. There had been no battle at Novara proper, and this would probably go down in history as the Battle of Vigevano, something more similar to the original historical Piedmontese plan: stop the Austrians at Vigevano and Mortara (historically, the unexpected loss of Mortara then forced the Piedmontese to redeploy near Novara)
In summary, the main action saw roughly 3 Austrian Corps (II, III and Reserve) facing off against 3 Piedmontese Divisions (2nd, 3rd, part of Reserve and Solaroli's brigade), with side battles at Mortara and around Abbiategrasso.
As in history, this time too King Charles Albert would abdicate to his son Vittorio Emanuele. This time too, Marshal Radetzky triumphed. This time too a rematch would be seen in 1859... but in the meantime, I'm sure to play this again! Great work on this game Sergio!

