Visualizzazione post con etichetta 1848. Mostra tutti i post

giovedì 12 aprile 2018

1848 Mincio Campaign - Battle of the Bridge of Goito report

After setting up the scenario map and defining the order of battle, I was able to play the battle. Here is the report.

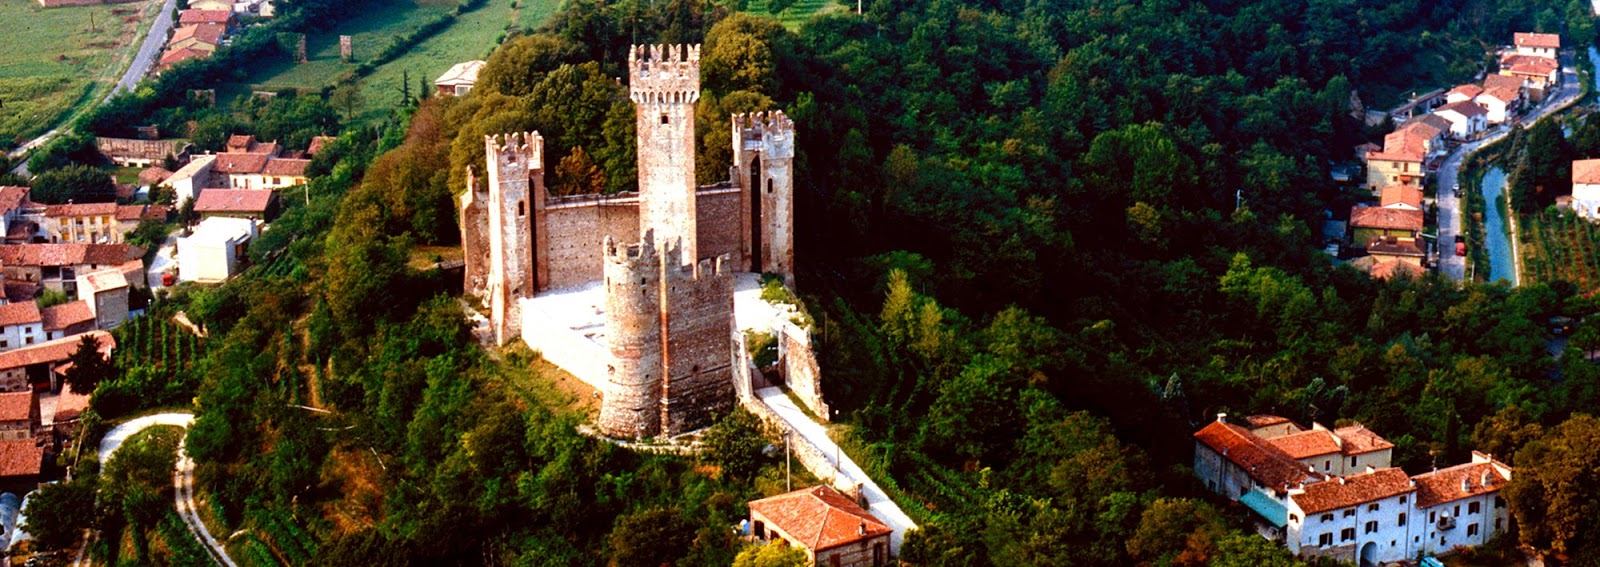
Scenario Deployment (Goito is on the Western side of the river)


All Austrian units deploy on the map first.
The Jagers deploy inside Goito.
Radetzky Hussars deploy near the town.
The two Oguliner Infantry units and the Artillery deploy on the Eastern side of the river, at player's discretion. Their deployment is made before the Piedmontese player rolls to see where and when his reinforcements enter.

Only one Piedmontese unit deploys at start, rest enters as reinforcements.
Aosta Cavalleria deploys on the hill facing south. It can't move on turn 1 because it's regrouping its detachments. From turn 2 it acts as normal.
Other units roll 2 dice for arrival: 1 die indicates turn of arrival; the other die indicates whether it arrives at entry point "A" (the road) or "B" (near the hill).
You roll for each of the following groups:

  • 2 Infantry units (9th Regiment)
  • 2 Infantry units (10th Regiment)
  • Bersaglieri
  • Artillery


Deployment at start

The Austrians and the Piedmontese cavalry deploy as shown. The only "challenge" is deciding where to put the artillery. Not knowing where the Piedmontese would enter, I placed it where it could cover the road. It's the more exposed part of the Austrian deployment and if the attackers come strong from that side, the artillery will be valuable.

However, it wasn't so. Only the Bersaglieri ended up entering from "A" (the road), with the rest arriving at "B". Aside from this, all Piedmontese reinforcements arrived early and sequentially (actually, all infantry was rolled to arrive at turn 1, but I decided that the order of march would have an effect, so I made half of them enter one turn after the other): 9th regiment on turn 1, 10th regiment on turn 2, the Bersaglieri on turn 3 and artillery on turn 4.

The first Piedmontese infantry seen from Goito

Goito seen from the Piedmontese infantry.

The Regina brigade is marching in, while the Austrians decide
to move some infantry forward to reinforce the defense
The fact the attackers mostly came from just one side made the Austrian guns useless in that position. At the same time, however, the attacking columns were moving cross-country and would take time to deploy and reach Goito, which in turn would allow the Austrians to reinforce the forward positions. Ultimately, they decided to keep the artillery still in order to target the Bersaglieri or in case the enemy cavalry punched through.

Opposing cavalry face each other while the Regina brigade
starts to deploy in attack formation. Bersaglieri are
threatening the flank, but they won't do much this time.
Under these rules, you can't move the troops at will, they're quite slow (especially if turning) so careful deployment from march to attack formation is vital. The Regina brigade would attack in two lines (9th rgt in first line, 10th rgt in second line) so reserves would be ready if needed, with the cavalry protecting the flanks. Artillery was to be brought up to firing range to help the infantry.

This is why I like NT's rules: you don't concentrate on abstruse rule details or endless lists of modifiers: to win, you have to employ tactics that would really work, so you have to concentrate on those - decision points shape the game and results are indeed more historical than those allowed by more complex rulesets.

The battle was really fun to play and produced realistic results. The Piedmontese infantry suffered some fire from the Jagers, but managed to take the town. The Oguliners decided they couldn't let them keep it, so counterattacked and retook it for the Austrians. The Piedmontese unit from the 9th regiment now was too spent to react, but the 10th regiment in reserve was ready to take its place and attacked Goito again, eventually forcing the Oguliners back again. I liked this back and forth.

The Piedmontese attack on Goito
This was supposed to be a good picture... anyway it's Austrian
point of view after the Piedmontese take Goito

The Piedmontese artillery has deployed at short range while the
Austrians still hope to hold the road

Another view of the same situation, from the other side.

With no fresh reserves, the Austrians couldn't mount another counterattack. This was a good time for them to get the Jagers and at least one unit of infantry back across the river and try a last stand protecting the crossing - the Piedmontese artillery had finally reached close range and was ravaging the defenders. I thought they could wait one turn, but I was wrong, they were cut off from the line of retreat and even if now the artillery was redeployed, it wasn't enough.

By turn 14, the Piedmontese had cut off most defenders from the bridge and started crossing. I decided that on turn 15 the Austrians could still try to blow the bridge up (rolling on the teaser's table, but with the attackers already crossing they had a -1 modifier). They rolled a 1, which meant that the wiring was incomplete: the Piedmontese infantry finished crossing and that secured them a victory.

Endgame

One note on the side battle between the cavalry units on the Austrian left/Piedmontese right. With most attacking forces coming from the hill side, covering the road with infantry was going to be a waste for the Austrians, so they only kept the Radetzky Hussars there. Their objective was to cover the flank and exploit any opening in order to attack the enemy one. At start the Aosta Cavalleria charged the Hussars, but the latter held their ground and actually forced the enemy cavalry back, who however passed both their morale check and therefore remained a threat: the Piedmontese didn't charge again, as they now had a slight disadvantage in hits, but also forced the enemy cavalry to remain there. The Bersaglieri too appeared on that flank, but they uncharacteristically had a very bad shooting and were mostly only a nuisance. Still, they could threaten the bridge, so the Austrians wanted to charge them but couldn't exactly because of the nearby enemy cavalry. It was a game of cat and mouse: every time the Bersaglieri closed, the Hussars turned to face them and the Bersaglieri had to back off, but then the Aosta Cavalleria threatened the Hussars in the rear/flank, and they had to turn again to face them. In this way both sides protected their flanks while the infantry battle went on, but also meant they couldn't influence it. The retreating jaguars tried to help, but they were too were mostly inaccurate in their shooting. The situation changed at the end, when the Austrian infantry was so weakened that the Piedmontese artillery could turn towards the Austrian cavalry: the firepower was finally too much and the Hussars fled, just as the rest of their army was routing as well.


The Austrians are crumbling and the Piedmontese artillery
can turn towards the Austrian cavalry
Notes on the scenario: it ended up being quite balanced. The Piedmontese have superiority but their actual attack pattern depends on where they enter from and they still have to be fairly quick at advancing or risk arriving late at the bridge. The Austrians are outmatched in terms of troops and firepower, but are not powerless and can slow the enemy considerably and have some interesting questions: slow down the Piedmontese before they reach the bridge or contest the crossing? Leave Goito to the Skirmishers or put an infantry unit inside? When to retreat behind the bridge? Where to deploy the artillery? A good range of choices that can make it a different game every time.

lunedì 26 marzo 2018

1848 Mincio Campaign - Battlefield at Goito

After tackling the crossing at Valeggio of the main army, now it’s time tackle the crossing at Goito, which historically was more challenging for the Piedmontese. Again, some tweaking of the actual terrain will be needed, because the area around Goito is very flat.

I will use Grant’s original first tabletop teaser (Bridge Demolition) as a basis because it represents the historical situation well. Austrians are defending and trying to blow up the bridge in order to slow down the Piedmontese. As I told here, however, the Piedmontese actually arrive earlier than historical, forcing the Austrian Brigade under Wohlgemuth to try to contest the advance more than historical.

In order to scale down the teaser to OHW-like map dimensions and army size, I decided to roughly halve the forces involved, which still keeps the original 1:1.5 defender/attacker ration. The Austrians will have 4 units, the Piedmontese 6, which is a common OHW scenario size, plus I will add one unit to each side. Therefore force ratio will be 5:7. OoB will be as follows (using Neil Thomas’ Wargaming 19th Century Europe rules):


Defenders: Austrian Army – Brigade Wohlgemuth from I Corps

(Army Quality: Good)

Radetzky Hussars: 1 Cavalry unit (Average)
Kaiser Jagers: 1 Skirmisher unit (Elite, Smoothbore Musket)
Oguliner Grenz IR: 2 Infantry Units (Average, Smoothbore Musket, Close Order)
Artillery: 1 Artillery Unit (Average)

Ludwig Freiherr von Wohlgemuth


Attackers: Piedmontese/Sardinian Army – 1st Division (General D’Arvillars) from I Corps

(Army Quality: Good)

Aosta Cavalleria: 1 Cavalry unit (Elite)
Bersaglieri: 1 Skirmisher unit (Fanatical, Smoothbore Musket)
Regina Brigade (9th and 10th regiments): 4 Infantry units (Average, Smoothbore Musket, Close Order)
Artillery: 1 Artillery Unit (Average)

General Federico Millet D'Arvillars

Some notes on the OoB:
The basis for the Order of Battle for this scenario is taken from the historical order of battle of the units involved, adapted for play balance. Unit quality is based on Neil Thomas' army lists, amended as described below following my judgement.

Sardinian/Piedmontese cavalry proved to be equal or superior to the vaunted Austrian cavalry in many occasions, and this was recognized by their opponents too, something that was later confirmed by their performance during the 2nd Independence War in 1859. In 1848 however their good quality and élan was hindered by the poor use the Piedmontese command made of the cavalry as a whole. The two heavy cavalry divisions were mainly held in reserve for "decisive blows" that never materialized, and as a result were underutilized. Rest of the cavalry too proved good when engaged but rarely used successfully at the strategic level - something that was corrected after the war.
The Aosta Cavalleria regiment can therefore be equated to a dragoon cavalry regiment, with Elite status due to its élan and quality. The Radetzky Hussars, on the other side, are rated Average and not Elite as in the rulebook, because I feel it's more realistic of their actual performance during the war.
The Austrians get a boost in skirmisher quality however: the Jagers performed well in most engagements and while they weren't as "fanatical" as the Bersaglieri, in my opinion they were still good enough to warrant an Elite rating. The Bersaglieri fought at the Bridge of Goito for the first time in their history, and their legend started here. They were supplemented by the small Griffini Legion (Lombard Volunteers of very good quality) and the Real Navi (marines) small battalion of 300 men. I include all these in the Bersaglieri unit.

Regarding line infantry, the Sardinians would have a major advantage over the Austrians in numbers but the need to quickly strike at the Austrians before they could blow up the bridge means they may not have time to muster the full division. Therefore only Regina Brigade of D'Arvillars' 1st Division is represented, with 4 units that roughly equate to its two regiments (9th and 10th). The Austrians have the Oguliners Grenz IR, and here I have 2 units of them roughly representing their two battalions, which is more than historical because I feel that Wohlgemuth, being closely pressed by the Piedmontese, would keep his forces united. Regarding unit quality, the Regina brigade was noted as being some of the best troops in the Piedmontese army, but they still don't warrant more than an Average rating, as do the Oguliners.

I note Army Quality in case someone wants to use the optional command rules from Neil Thomas’ Wargaming 19th Century Europe rules. During the historical battle, both sides proved to be competent and professional, and neither proved to be superior to the other in pure generalship. Neither Wohlgemuth nor D'Arvillars showed superior generalship during the campaign, but the small engagement also means they could easily keep control of their forces in such a compressed area, justifying a "good" rating for both forces. Players willing to reduce this can make both as "Average", which may hurt the Piedmontese more than the Austrians in play balance terms due to their need to strike fast, so do this only if you feel the attackers would otherwise be too strong.

The Battlefield:
The original map from Grant's Teaser looks fairly good already, and I used it as a basis for my scenario. At first I  decided to include a road (mentioned but not shown in Grant's map) that forks so it can connect both attackers' entry points A and B, reducing the hills to only one - the real battlefield being mostly flat with some small heights roughly there. The result was this one:


I liked it but after checking the historical map from the Habsburg 2nd Military Survey, I noted the road doesn't fork where I thought.


The roads link a bit farther than the town. So I revised the map to look more like the historical one:


Historically, Piedmontese troops converged on Goito from the road, but then in the end deployed in a half circle while their point units attacked the town and bridge. I will keep the original teaser random entry to add some uncertainty to the scenario. The two possible entry points of the attackers are the road (entry point "A") and a point slightly to the right of the hill (entry point "B") which roughly corresponds to what Grant states in his teaser and fits the historical scenario well. I will roll for random reinforcement arrival as in the teaser.

Initial deployment will see the Austrians all deployed on map, on both sides of the river, while a single Piedmontese cavalry unit will be on the hill. Rest will get to the battlefield from turn 1 onwards, depending on die roll. The Piedmontese have 14 turns to reach the Bridge. if They can't cross the bridge by that turn, on turn 15 I start rolling for the explosion, using Grant's table from the teaser.

Stay connected because the battle report will follow soon!

sabato 3 marzo 2018

1848 Mincio Campaign - Battlefield at Valeggio

I played the first scenario of the campaign using a pre-existing scenario (n.5, Bridgehead, from One-Hour Wargames). It worked fine and it was fun. But what if I want a more realistic battlefield?

In the Habsburg 2nd Military Survey map, Valeggio is this one:


Valeggio sul Mincio and Borghetto

I’ve been there 2 times with my wife, for romantic weekends: Borghetto is a lovely place and the Parco Giardino Sigurtà, full of flowers in spring, is a nearby attraction (by the way, inside the Giardino there’s a place marked as the one where Napoleon III and Franz Joseph met after Solferino).
The bridge over the Mincio was built in the XIV century and was massive, because it was intended as being a sort of dam too, but it never really worked as expected. In addition, the French blew it up in 1701. A simpler, wooden bridge was rebuilt between the two remaining older “blocks”, still existing in 1848 (now it’s made of iron).

Il Ponte Visconteo, the bridge over the Mincio at Valeggio,
seen from Borghetto. You can see the remnants of
the XIV century structure.
Another ford is possible at nearby Borghetto, but what maps fail to show is that the two places aren’t at the same height. Borghetto is lower and water current is fast. Likely there was a small wooden bridge there (there's a bridge even now and a pontoon bridge could be possible) but it would be very narrow and the current has to be kept in mind. In addition the position is exposed because of the nearby dominating hills that separate Valeggio itself from the river. Then you would have to make a steep rise to reach the top of the hills. The bigger bridge (called “Ponte Visconteo”, “ponte” being the Italian for “bridge”) is higher and makes it easier to reach the hills and the town. There’ s an old ruined castle (it was ruined in 1848 too) in front of it, but not really a strongpoint that can block the path of attackers. 

The castle (Castello Scaligero) looking at the bridge
over the Mincio. Borghetto is the town on the left across
the river. In 1848 it was smaller.
Another view of the castle, showing the hillside. Valeggio is
on the right, Borghetto on the left (remember they were
smaller in 1848)
Then, after Valeggio, there’s nothing. 

Larger view of the area around Valeggio

It’s almost all flat up to Verona, with only some hills in the north, but they affect the area at Monzambano farther north more than they would do for any battle at Valeggio. In other words the bridge, the hills around Valeggio and Valeggio itself are the only features that would influence a battle. Regarding woods, you can see the area between the bridge and the hills is now wooded, but the map doesn't really show this unless we assume the slopes had wood. The area around the river could be at least partially marshy... depending on how you interpret the "greenish" color there.

I'm not sure if the attacking Piedmontese tried to cross at the main bridge or the smaller Borghetto one. I didn't check the direct sources, and Embree's Radetzky's Marches mentions Borghetto only - but doesn't mention the two bridges or say which one was used; it just mentions a wooden bridge. The Ponte Visconteo would be better, more direct but, possibly, offer less cover. At the same time the bridge at Borghetto would be smaller but would require a steep rise later. The account of 3 Piedmontese soldiers being trapped on the Western side of the river for the night after the Austrians had shelled the bridge may imply it was the one at Borghetto (because they found refuge in the village buildings) but in theory they could have been likewise able to get there from the other bridge too. Anyway, in my scenario it wouldn't matter much: the Piedmontese have taken the bridge and occupied the hills and are trying to protect the bridgehead from attacking Austrians. The bridge itself would be less relevant as whoever owns the village of Valeggio and especially the hills at the end would actually win.

A simplified map (OHW-style) for a “Bridgehead at Valeggio” scenario could be like this (total size 90cm x 90cm - or 3'x3'):

From the South (as in the historical map)

From the West

From the East
The area of Valeggio is the one roughly within the buildings, and the hills should be impassable for cavalry. Artillery on the hills can fire above the town. It can be a very strong position for defenders, even if, if they are few at start, they may be unable to defend it all and therefore be vulnerable to a determined attack. As in OHW scenario 5, attackers' arrival should be randomized between the two roads and the south (or only between the two roads but this may make it easier for the defenders to concentrate). Play balance may need some adjustment.

If you really want to add some more terrain, add some woods just near Valeggio. They don't look particularly heavy, so maybe they would just be another help to the defenders, which may skew play balance even more. We can assume they are there but have no influence on play.

Regarding OoBs, randomizing is fine, but likely both sides would have skirmishers.

One final historical note: at first glance the hills between Valeggio and the river look like a formidable position for defenders trying to cross. Why didn’t Radetzky try a stronger defence? He limited his troops to a token delaying action. The problem is that Valeggio is effectively in the middle of the Mincio valley and, as noted, has no relevant heights or defensive terrain behind it up to Verona.

General Mario Broglia,
CO of Sardinian 3rd Division
Yes, a reinforced Austrian position could block the advancing Piedmontese attackers (General Broglia’s 3rd Division, II Corps) but the Piedmontese were trying to cross north at Monzambano (a much harder defense) and south at Goito too. Therefore the Piedmontese could cross elsewhere and then try to trap the Austrians (at least a brigade, possibly more). If the Austrians then tried to disengage to reach Verona, they could be caught in the open plain and destroyed by the superior-number Piedmontese.

In order to fully protect all three crossings instead, Radetzky would have had to stop his race to Verona, divide his forces across 3 non-mutually-supporting locations not knowing beforehand where the enemy would strike and hope he could hold all three. If one or two fell he would risk isolation of at least one of his forces and possibly severe losses if somehow the Piedmontese managed to cut his retreat lines to Verona – which was exactly what he wanted to avoid by marching full speed to the fortress. So, given that he may have had to retire to Verona anyway, it made sense to go there immediately, and just leave token forces to blow up the bridges and delay the advance. In the end, it proved to be the right thing to do.