mercoledì 23 ottobre 2019

Battle of Saguntum (Battle Report)

I've played the Battle of Saguntum scenario. At first the battle unfolded on mostly historical lines: Zayas' Expeditionary Corps advanced towards the French Left Wing, while O'Donnell's Valencians and Mahy's Murcians proceeded to attack the hills defended by the enemy Right Wing. However, it remained effectively two distinct fights, with little influence on each other.

Spanish point of view (Zayas)

Spanish point of view (O'Donnell, Mahy is on the left)

French positions (Right Wing)
Overview of deployment


On the Spanish left (O'Donnel and Mahy), problems with command control led the two sides to close fast, but the Spanish couldn't coordinate properly. They did some damage with the horse guns, but the French skirmishers made short work of the Murcians. The Valencians had some more success when Miranda's division forced the Poles back and briefly gained the top of the hills, but both sides ended up weakened and still facing each other. Once Robert's brigade had eliminated the Murcian infantry alone, it moved to hit the Valencians on the flank, sealing their fate.

Attack by O'Donnell (right) and Mahy (left)
on French positions

Villacampa attacks the French positions, but will be repulsed


On the Spanish right (Zayas), at first Loy's cavalry had the upper hand against the French Dragoons, as historically, but were then routed by the Cuirassiers. These too routed when hit by Spanish artillery, but it was the Spanish veterans that definitely underperformed (compared to historical results). Lardizabal troops faced both Harispe and the Italian infantry and were unable to advance much, while Zayas' division took the worst from Habert's troops. The Spanish first suffered the enemy skirmish fire, then they were counterattacked by the fierce French who scored 6 hits out of 9 dice rolled, while the Spanish only scored 1. They Spanish "veterans" were routed and failed to rally at the end of the turn (it was turn 3). Hebert then attacked a Spanish horse battery and routed it too. At the end of turn 3, with 5 units routed and not rallied (Zayas' division, Villacampa's Valencians, all the Murcians and one other artillery), I halted the battle as it was getting late.

Loy's cavalry routs the French Dragoons...

...but is then routed by French Cuirassiers, who then
face the Spanish artillery while Lardizabal's division attacks

Lardizabal and Villacampa are repulsed (the latter will be
routed shortly after), but Miranda presses the Poles.

I have to say I wasn't impressed with the scenario at first. I knew it was hard for the Spanish, but play balance wasn't the real issue: the battle saw little maneuver, also because of terrain and restrictions to cavalry. Still, it has some interesting challenges: the Spanish player has some interesting decisions to make: it has few CPs and using them on Zayas and O'Donnell looks like the best choice (they are his best troops), but Mahy's Murcians are really weak and due to Mahy's Aggressive status they tend to charge the enemy anyway, which makes them even more vulnerable. They should be kept behind, but this requires using lots of CPs on them and making O'Donnel (in particular) more prone to not activate as desired. This time, the Spanish mitigated this with several good initiative rolls, but it also led to some stops in the advance which favored the hard-pressed French.

For the French, quality is superior but a fresh Spanish division is still hard to face, so it needs to weaken them with skirmish fire at first, and the evaluate when to counterattack. Deciding where and when to commit his reserves (which are very few, mainly the Italian infantry brigade on the Left Wing) could be relevant, also because it risks having his forces effectively isolated from each other. Options are limited however.

Not sure I'll play this scenario again due to the general lack of options for maneuvering, but at least it was useful to test the rules again, which was positive.

venerdì 6 settembre 2019

Battle of Saguntum (scenario)

For my next battle using the Grande Armee rules I chose Saguntum, again taken from here. I wanted to try the rules again, and add the rally rules in. I'll also switch and test FPGA-style skirmish fire, with both sides rolling a die and adding the Sk factor. Whoever has the higher results inflicts 1 SP loss to the other. If result is a draw, nothing happens. If one side is beyond range (like Sk1 engaged at Sk2 range) or has Sk0, it will not inflict SP losses on the opposing unit even if it rolls higher.

This time I needed very few modifications to the existing scenario. Under my rules modifications, I thought that Loy's cavalry (for the Spanish) couldn't really attack if it had only 1SP as in the scenario, so I merged both cavalry units in Zayas' command as a single 3SP Trained cavalry unit, which would also make them behave more historically anyway.

The Battle of Saguntum in 1811 was a small but important clash between Suchet's forces (which were besieging Saguntum) and Blake's relieving forces. Blake was defeated and the town surrendered soon after.


Scenario general info:
1. Basic Length: 6 turns.
2. Weather is Normal (with no variation). Ground is Hard.
3. See original scenario for terrain effects: Streams count as obstacles. Horse may not enter the Carob groves which are all land to the NE of the streams between the Expeditionary Corps and the French except for a 3" area along the Valencia- Saguntum road. Horse may not enter any upland area.
4. Both armies set up simultaneously, as indicated on the scenario map.
5. Morale of the French Army is Confident. Its Break Point is 3.
6. Morale of the Spanish Army is Shaky. Its Break Point is 4.

Scenario map:


French Army
Army Commander: Marshal Suchet (Good)
This is a Napoleonic Army of 2 Forces

Left Wing (L): Suchet 1 / 12"
1/L Hebert's Brigade                    Trained   9SP   Sk2
2/L Harispe's Division                 Veteran   9SP   Sk2
3/L St.Paul's Italian Brigade        Trained   6SP   Sk2
1C/L Cuirassiers                          Veteran   3SP
2C/L Dragoons                            Trained   2SP

Right Wing (R): Chlopiski (V) 1 / 12"
1/R Poles                                     Elite        6SP   Sk2
2/R Robert's Brigade                   Trained   8SP   Sk2
C/R Italian Horse                         Veteran   2SP

Spanish Army
Army Commander: Blake (Average)
This is a Traditional Army of 3 Forces

Expeditionary Corps (E): Zayas (V) 2 / 9" Aggressive
1/E Zayas' Division                      Veteran   8SP   Sk1
2/E Lardizabal's Division             Veteran   7SP   Sk1
3/E Velasco's Valencians             Raw        5SP
C/E Loy's and Caro's Cavalry      Trained   3SP
1A/E 4-pdr Horse Arty
2A/E 4-pdr Horse Arty

Valencian Corps (V): O'Donnell 3 / 5" Aggressive
1/V Miranda's Division                 Raw        6SP
2/V Villacampa's Division             Raw        6SP
3/V Obispo's Division                   Raw        6SP
C/VSan Juan's Horse                   Raw        4SP
A/V 4-pdr Horse Arty

Murcian Corps (M): Mahy 4 / 3" Aggressive
1/M Creach's Brigade                   Raw       3SP
2/M Montijo's Brigade                   Raw       4SP
A/M 4-pdr Horse Arty


This isn't an easy battle for the Spanish to win. Only a few units are veterans and reliable, while the rest is of low or very low quality, with their Raw quality meaning they are unlikely to recover once routed. They also have a difficult command situation, even if the "Aggressive" status of their Sub-Commanders (which in this battle means they are prone to follow their attack battle plan) helps move them forward even in face of few CPs. Suchet instead will have little or no problem in controlling his higher quality forces.

Cavalry is very limited in numbers and strength for both sides. Yet its ability to interdict skirmishers (especially for the Spanish versus the French), threaten infantry flanks and face opposing cavalry trying to do the same may prove vital for both sides. In the end, this is a fairly small scenario that lends itself well to being used for introducing new players (in this case, just let them use the French!).

giovedì 5 settembre 2019

Battle of La Coruna (Battle Report)

I've played the Battle of La Coruna scenario I've recently modified (see here). It was a fun battle, and helped me test my modified fast Grande Armee rules (more on this later). I have a heavy green cloth to cover the table and books under it as hills. The weight of the cloth allows it to give the whole battlefield a very natural look of hills and valleys, with hillsides gradually degrading from the top. I didn't have anything to make the river on the French right / British left, but I had a turn record sheet there, so anyway there was no chance of units inadvertently moving there.

View of the battlefield, showing elevations (and the turn record sheet)

Another view from above

The battle started in a mostly historical way. Mermet's division on the French left started its attack towards Elvina and Baird's division on the heights, while the rest of Soult's troops advanced more slowly and less coordinately towards Hope's troops.

View from the French (Soult's) positions

View from the British (Sir John Moore's) position

British Artillery alone routed one French brigade but the rest of Mermet's troops pressed on. A furious skirmish battle erupted along the line. Still, the British forces were progressively suffering losses too and despite heavy casualties the French ultimately gained the top of the hill. It was brief however, as they were then routed by a counterattack by Werde's British Guards.

Start of French attack

The other side

Overall view of the French advance

French right flank slow, while action unfolds on the left

Around Elvina

The French have stormed the top of the hill...

...but get repulsed by the Guards' counterattack

Things went mostly likewise on the British left/French right. Delaborde however moved more slowly (Soult was concentrating on the fight on the left) and the skirmishing was more protracted.

Another view of the struggle on the hill
Once the French managed to organize a full assault, it was fierce. Faced with a strong British defence from the top of the hill, Delaborde led his troops personally with great valour but was shot and killed just as one of his brigades managed to open a hole in the British line, threatening to rout the entire enemy position. Hope quickly intervened to stabilize the line and repulsed one other French brigade, but he too was severely wounded and had to leave the field, leaving this part of the battlefield involved in a confused struggle. Ultimately the French managed to briefly storm the top of the hill, but they too were repulsed, this time by Crawfurd's reserve brigade.

Delaborde killed

As dusk neared, the French attack had been defeated along the whole line despite heavy British casualties. On the French far left / British far right the French cavalry and Paget's reserve division effectively nullified each other, but in the end this helped the British by avoiding a French flank attack on Baird's battered troops.

Technically the French routed, but the British had no cavalry to pursue and anyway were more interested in covering the embarking troops. The British could then embark without further French interference. Both sides suffered more than historically, thanks to the fact that this time Soult managed to attack on almost all front, even if a certain lack of coordination made his attacks less effective, and his lack of reserves proved vital, but the game had a mostly historical flavor.

It was a fun game, with a great Napoleonic feel that I hadn't felt in a long time. I'm very pleased with how the Grande Armee rules worked, especially with my modifications making them faster. I'm wondering if using the unit quality/rally rules would add much more time, because - contrary to my previous judgement - I now feel they could be useful to give a bit more flavor. At least, I'd like to try them once. I'll probably play a test game including them, to see how they work. If not, I will leave them aside.

venerdì 2 agosto 2019

Battle of La Coruna (scenario)

It has been a long time since my last post. Painting has been very slow, and miniature gaming too. But I never gave up so I'm ready for my next game.

The idea is to test my fast Grande Armee rules with a more challenging scenario, using full rules for command and control, and the turn/impulse sequence. I took a small scenario, the battle of La Coruna. The scale is lower than my usual target (each unit is a brigade or a large regiment, instead of a division), so as to keep the command rules meaningful, but the battle is still suitably small.

The base for my scenario is found here, but I've changed a few things, reducing the units (leaving aside those who didn't fight, only leaving them as optional troops for play balance) and a few other details.

Scenario general info:
1. Basic Length: 3 turns.
2. Weather is Normal (with no variation). Ground is Hard.
3. The river is unfordable.
4. The British set up first, then the French, within respective deployment boundaries.
5. The French have initiative on turn 1 Impulse 1. Roll as normal after that.
6. Morale of the British Army is Shaky. Its Break Point is 4.
7. Morale of the French Army is Confident. Its Break Point is 4.

Scenario map (from the original scenario):


British Forces
Army Commander: Sir John Moore (Great)
This is a Traditional Army of 3 Forces

1st Division (1): Baird 3 / 4"
1/1 Warde (Guards)                6 SP   Sk2
1/2 Bentick                             5 SP   Sk2
1/3 Manningham                    5 SP   Sk2
1/A 6-pdr Foot Arty

2nd Division (2): Hope (V) 1 / 6"
2/1 Leith                                 5 SP   Sk2
2/2 Hill                                   6 SP   Sk2
2/3 Crawfurd                          5 SP   Sk2
2/A 3-pdr Horse Arty

Reserve Division (R): Paget 1 / 3"
R/1 Anstruther                       5 SP   Sk2
R/2 Disney                             3 SP   Sk2

Optional: Access to La Coruna (A): Fraser 3/4" (if used, the Army now has 4 forces instead of 3)
A/1 Beresford                        6 SP   Sk2
A/2 Banes                              5 SP   Sk2
A/3 Portuguese Volunteers    4 SP
A/4 Fane (Hvy. Dragoons)    4 SP


French Forces
Army Commander: Marshal Soult (Good)
This is a Traditional Army of 4 Forces

I Division (I): Merle 4 / 3" Aggressive
I/1 Legere                              7 SP   Sk2
I/2 Ligne                                6 SP   Sk2
I/A 8-pdr Foot Arty

2nd Division (2): Mermet 3 / 4"
II/1/1 31e Ligne                     4 SP   Sk2
II/1/2 47e Ligne                     4 SP   Sk2
II/2 French & Swiss               7 SP   Sk2
II/A 8-pdr Foot Arty

III Division (III): Delaborde (V) 2 / 3"
III/1 Ligne                              5 SP   Sk2
III/2 86e Ligne                       3 SP   Sk2
III/A 8-pdr Foot Arty

Cavalry Division (C): Under Soult command
C/1 Lahoussaye (Dragoons)  6 SP
C/A 4-pdr Horse Arty

Optional: add the following units to the Cavalry Division
C/2 Franceschi (Hus/Chas)   5 SP
C/3 Lorge (Dragoons)           6 SP


Optional Units:
These units weren't present during the battle. Frazer's forces were protecting the approaches to La Coruna, with the cavalry already on board the ships. Lorge's French cavalry instead was protecting the right flank of the French forces and didn't participate in the actual fight, while Franceschi's light cavalry division was on the left and did little in front of Fraser's forces. They were all included in the original scenario for balance purposes, so I prefer to keep them optional. In particular, if the British forces look too outmatched, the British forces should include Fraser's command (including the cavalry), which brings the British Army to become a Traditional Army of 4 forces. If the British units are added, add Franceschi's and Lorge's units to the French Cavalry Division too.


I'm eager to try this scenario and see if the small changes I've made are ok or unbalance it too much. This will also be my first true test of my full fast version of the Grande Armee rules.

venerdì 5 aprile 2019

Flank attack... again

Finally some game time! With little time available I replayed the Flank attack scenario (n.6) from OHW, this time inverting the army composition.

Therefore, the French now had 4 Infantry units, 1 Light Infantry unit and 1 Light Cavalry unit. Their opponents, this time Austrians, had 3 Infantry units, 2 Artillery units and 1 Light Cavalry unit. I only took 1 picture towards half of the battle.

Mid battle situation

The Austrian deployed one arty and 1 infantry units as blocking force, while the rest deployed on the flank but north of the hill. The French therefore had to both face artillery fire during their advance and couldn't "outrun" the flanking force, which was able to support the blocking force effectively. This forced the French to use half their army to screen the flanking force - but this left too few units to broke through the blocking unit. In the end they were unable to move 3 units out of the trap (only 1 could do it) and were defeated.

I liked how this scenario run better than last time. Force composition can really influence the outcome, as well as smarter deployment by the flanking force. The troops trying to break through instead should really be aggressive or they won't be able to exit the 3 required units.

mercoledì 3 aprile 2019

Painting update March 2019

Still almost no gaming and just painting... However, I'm fairly satisfied with my painting: I could still do better both in quality and speed, but somehow I manage to paint 4 bases/units each month (barely), which is the fastest I've been in years (I know I know, my standards were really that low...)...

Last units painted since last Christmas have been 3 units of French Line Infantry and 1 of Russian Line Infantry (all ESCI), 2 of French Guard Artillery (Esci) and 2 of Austrian Artillery (HaT). All based for my version of Grande Armee.

2 units of French Line Infantry

1 unit of Russian Line Infantry (left)
and 1 of French Light Infantry (right)

Artillery units "mixed" by my kids

A more "martial" view of the 2 Austrian (left)
and 2 French Old Guard (right) artillery units


Currently on the painting table are

The Austrian Cuirassiers are the easiest and quickest to paint, while the Voltiguers are a real challenge due to the excellent Zvezda sculpting that brings out lots of details. Looking forward to finish them all!

sabato 9 febbraio 2019

One Hour Wargames Scenario 6: Flank Attack

Salamanca lite...


I played One Hour Wargames Scenario 6: Flank Attack (1), which is inspired by the battle of Salamanca. Salamanca was a battle driven by surprise, and this element can't be attained in a wargame scenario, so the scenario is slightly different from reality.

I used this battle as a sort of playtest for my fast Grande Armée rules. I left Command and Control rules aside, including the impulse system, and I just tested the skirmish, artillery, movement and close combat rules. The game was therefore played with the normal OHW turns.

French forces on the march, while British troops threaten their flank

Seen from the other side, with the British blocking force

The French had 3 infantry (5SPs Sk2 each), 1 cavalry (6 SP) and 2 artillery units (Medium). The artillery units in particular were badly suited to a battle where they would have had to move fast. The British instead had 4 infantry (5 SPs SK2 each), 1 light infantry (6SPs Sk2) and 1 cavalry (5SP) unit: the lack of artillery means they have to get close to the French to stop them.
In short, the French had to sacrifice 1 infantry and 1 artillery unit to fend off the larger British flank force, while the rest faced the small blocking force. The initial French attack was repulsed, but 1 artillery and the cavalry unit arrived (the cavalry having previously repulsed their British counterparts) and a new attack managed to open the hole needed to break through and allow 4 units to exit the north edge, given them victory.

The French attack on the British blocking force

In hindsight, the British had to deploy the flanking force closer to the blocking force: this would  have allowed them to be in a better position to stop the French. Instead, the flanking force was farther, and they were too far away to avoid the enemy breakthrough.

The Grande Armée rules worked well, especially the skirmish, artillery and close combat rules: they were easy to play and fast. Regarding movement, I gave up variable movement quite early, and chose fixed movement: turning takes 1/4 of the movement, moving backwards while keeping the front to the enemy takes 1/2 movement, difficult terrain takes 1/2 of the movement.

Probably the same battle could be played inverting the army composition.

I hope to test the command and control rules soon, including the variable impulse turns.

giovedì 24 gennaio 2019

Scenarios For All Ages

I finally bought this from Caliver Books. I've been eyeing it for some months, until I realized that it was best to buy it before Brexit in order to avoid any extra duties that may arise from that...


43 scenarios plus 4 mini-campaigns and 5 mini-games are really good stuff for people who like scenario-based wargaming. Not all scenarios are suited to Napoleonic or 19th century warfare, but they are all interesting reading nonetheless and will provide a nice complement to the OHW scenarios, bringing lots of ideas for playing.

mercoledì 16 gennaio 2019

Fast Grande Armee

How to make Grande Armee faster

In a previous post I said I appreciated the Grande Armée (GA) ruleset a lot, but also saw the need to make it play faster – without going the FPGA way, which doesn’t really speed things up. Now I’ll get more specific on the changes I’m making. In general, I will drop everything that makes the game slow without giving a relevant and key historical upgrade at this level (personal opinion only of course!)
In order not to break any copyright, I’ll just mention each rules section as in the original rules and only note what I change and how, so you still need the rules to make full sense of it.
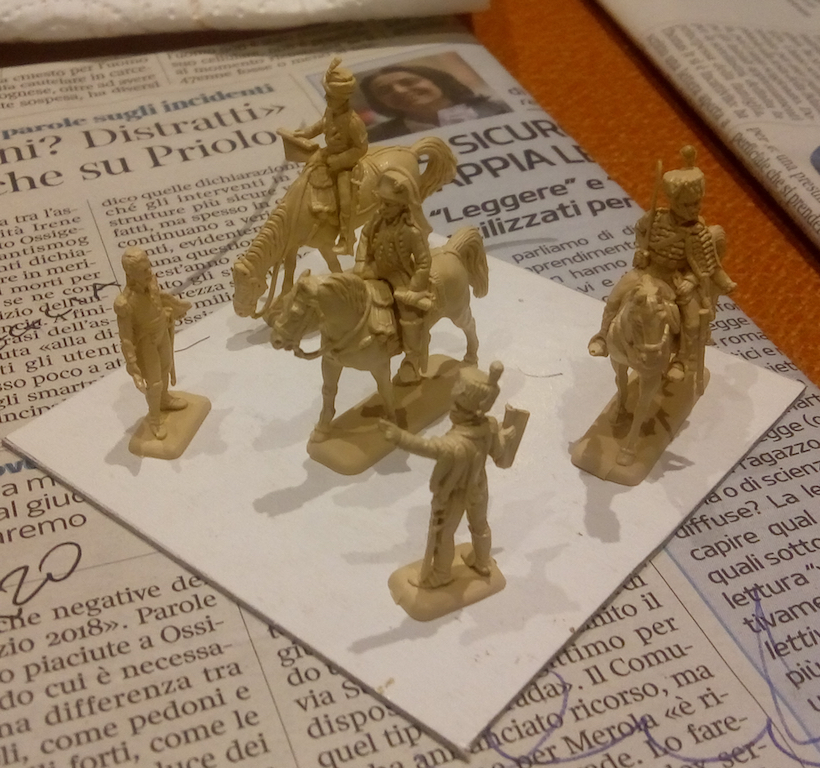
Napoleon's Imperial General Staff - on a 3" x 3" base

A.     Setting up for Play

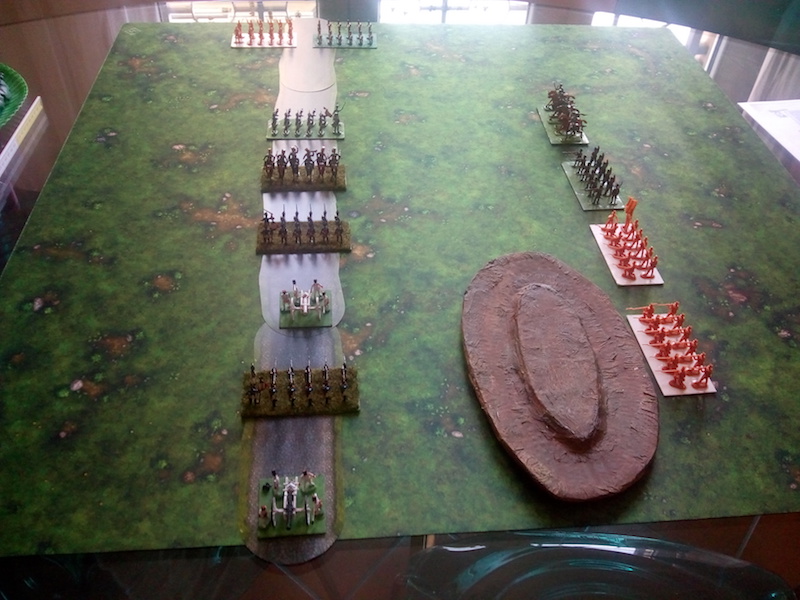
The main changes here relate to units basing and unit size representation. My units (remember I play mostly with 1/72 plastic minis) are already based for OHW and I’ll retain that basing for both aesthetic and practical reasons.
Units are therefore based as:       
Infantry                  10cm x 5cm (4” x 2”), usually 12 figures in 2 ranks
            Cavalry                   10cm x 5cm, (4” x 2”), usually 6 figures (5 figures in some cases) in 1 rank
            Artillery                  5cm x 5cm (2” x 2”), usually 1 gun and 3-4 figures.
Of course you can play with a more standard (for GA) unit base size of 3”x 3” (7,5cm x 7,5cm) or 3”x 2” (7,5cm x 5cm), I just don’t want to rebase and like them as they are now!
For leaders, OHW doesn’t need any, so I mostly use the Grande Armée basing scheme for 25mm figures, as it’s already appropriate for my minis size:
                  C-in-C                      7,5cm x 7,5cm (3” x 3”), with at least 3 figures
                  Sub-Co                     5cm x 5cm (2” x 2”), with 2 figures
                  Generals/ADCs        TBD, with 1 figure (a small difference from the GA scheme)
Also, in order to be able to play even large battles with a reduced table size and number of minis, I generally consider 1 unit = 1 division or equivalent (instead of 1 unit = 1 brigade). Considering the game is from the Army Commander’s perspective, two levels  down from it is exactly the division level, so it makes sense from that perspective too. For artillery, only major batteries will be represented, or those who had a distinct impact, which may mean a reduction of artillery units in respect to those indicated by a traditional GA scenario (see also changes to section F later).
Cavalry is differentiated between Heavy Cavalry (HC) and Light Cavalry (LC), this has an effect on movement and combat.  It may be difficult to evaluate where Dragoons fit in this… I generally classify them as Light Cavalry because, as explained in the GA rulebook too, they mounted smaller horses than HC, charged more loosely and were not up to Cuirassiers in close combat terms (which is the main distinction at this scale), but feel free to disagree.
For smaller battles, I will retain the 1 unit = 1 brigade or equivalent standard representation, so I can still play all kind of battles.

B. Playing the Game

Will use this as it is, even if for the turn # correspondence with parts of the day I will use the handy FPGA equivalence. Very little will change in actual game terms however: if a game only lasts a few turns, it means the battle has likely started later in the day. And it works for a random choice of starting time and game length for non-historical battles.

C. Weather

Will use this as it is, even if effects on movement will have to be checked in respect to changes to section H.

D. The Command Phase

Will use this as it is.

E. Skirmishing

Will use this as it is. I will evaluate whether Sk2 units should use 10cm range as Sk1, to keep everything more consistent and, therefore, faster to play (unless it breaks balance a lot).

F. Artillery

Will mostly use this as it is, but I will only differentiate between Heavy Artillery (mainly 12pdrs) and Medium Artillery, and generally only related to corps batteries or large concentrations. Light Artillery will be mostly included into units. Distinction between “horse” and “field” artillery will remain for movement.

G. The Control Segment

Will use this as it is.

H. The Movement Segment

This is one of the two sections where I make most of the changes. I’m going with a Neil Thomas’-inspired approach where you can simplify the mechanics and still get most of what is needed to correctly represent what happens, especially given the scale.
First of all, all movement rates will be in cm, not in inches, in order to allow me to use a smaller table. Given that units now are divisions, disruption will be minimal and still give the proper “feel”. I’m still evaluating if cavalry needs to be a bit faster, but I’ll have to playtest it first so for now I won’t change it.
Normal movement is fixed, like in FPGA, and I will retain the distinction between fast and slow foot. Only when crossing difficult terrain or being within 10cm (4”) of the enemy I will use the random roll movement. Therefore, the Terrain Table is discarded.
Units don’t wheel, but pivot on their centers, like in NT’s rulesets. It’s a smart mechanics that gives the same end result but is faster and easier to play.
The 6” rule becomes the 4” rule (4”, or 10cm, is exactly 1BW and I like the correspondence). I keep the requirement for units to only move forward or backwards or pivot, but I drop the friction rule that is too time consuming for very little added realism.
Cavalry can’t evade, and Artillery can’t evade. It’s made to simplify two mechanics that are always slow and troublesome to play (for very little added realism at this scale).

I. Combat

This is the other section where I make most of the changes. I generally go for a more “Blucher-like” (but also NT-like, since I feel that’s where Sam Mustafa may have taken some ideas from) approach, even if I’ll retain a few concepts from GA.
As in GA, square up attacker’s base to the defender. No more than 1 attacker per defender’s base side. No more than 2 attackers for each defender, total. Attacker needs to have at least 2SPs left.
Roll 1 die per number of SPs
Add 1 die if (all that apply):          MX brigade not in or attacking towns or entrenchments
                                                       (V) officer using its bonus
                                                       Units is entrenched
                                                       HC vs LC
Subtract 1 die if (all that apply):                 Attacking uphill
                                                                    In difficult terrain
                                                                    Vulnerable (as defined in GA)
                                                                    Attacked by combined arms
Roll dice. Each die scores a “hit” on 4+
If defender is flanked: defender re-rolls hits (once)
Infantry vs Cavalry: Infantry doesn’t retreat, no matter the result. Can’t be flanked, but can suffer combined arms attack if attacked by Cav and Inf on same impulse.
Combat results: basically, the attacker wins the combat if it scores more hits than the defender. If it scores less or equal to the defender, the defender wins. However, if the defender is too weak (has 1SP left), it may prove unable to stop the attacker anyway. The attacker, too, will always suffer at least 1 SP. In detail:

First, check the Defender:
         If Defender more or equal hits than Attacker: Defender loses 1SP. If broken, remove
               If Defender less hits than Attacker: Defender loses #SPs equal to difference in hits. If broken, remove; if not broken, retreat

Second, check the Attacker:
         If Defender more or equal hits than Attacker: Attacker loses 2SP. If broken, remove; if not broken, retreat
               If Defender less hits than Attacker: Attacker loses 1SP, may advance if no defenders remain in contact.

Retreat distance: 3” + difference in SP loss (in inches). For cms: 7,5 cm + (difference in SP loss * 2,5cm)
(example: difference in SP loss is 1; retreat is 4 inches or 10cm)

J. Things Fall Apart

Will use this mostly as it is, but broken/routed units can’t rally: they are instead directly eliminated the moment they are reduced to 0 SPs.

K. The Rally Segment

I will discard this section entirely: units don’t rally during the battle. While I see what the author was aiming for with this rule, it adds a slowing down mechanics with, again, reduced historical relevance at this scale. Simply said, it’s not worth it (personal opinion of course!). Due to this, any training rating for units is discarded.

L. Victory

Will use this as it is, as it still allows rallying at day’s end if the battle is a multi-day one, which I feel is more appropriate.

M. Special Cases

Will use this as it is, if/when needed. Maybe I could amend something, but I prefer to wait unit I need to use anything from this section and see directly if it’s ok as it is or needs some changes. So far I’m not going to tweak anything here.

N. Optional Rules

Will use this as it is, even if I don’t plan to use these optional rules much. Therefore, like section M, I’ll see if they need changes only on an ad-hoc basis, no need to do it now.